Wednesday, September 4, 2013

Analyze TestNG Test Results

After a test is run there are multiple ways of viewing the test results. The quickest way is to use the Output and TestResults windows.

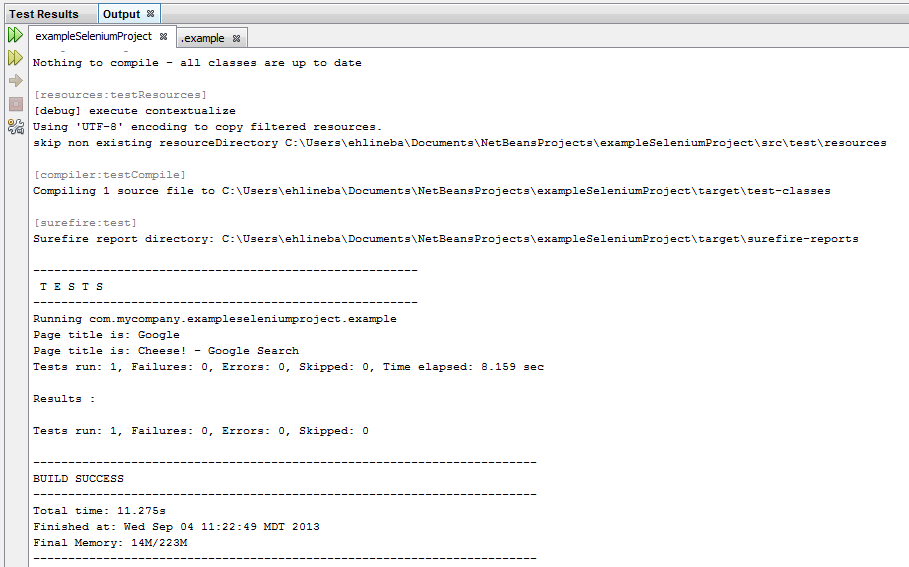
Using the Output window:
The output window will show what the test is doing in real time. You can use the System.out.println(); to print to the output window. This can be handy when debugging or just in finding out more details in your tests. For example you may want to ensure that the right element is being hit. To do that you would print a line showing the text the webdriver extracted from that webelement. In the basic example this was done using "System.out.println("Page title is: " + driver.getTitle());" . In the image below of the output window the output of that line of code is written.
The output window shows key summary info. The "Total time" and result of the test or tests.

Using the TestResults window:
If the test or tests pass this window will not be very helpful. It will merely show the time the test took to complete and 100% passing rate.
If the test fails it will be helpful in narrowing the reason why it failed. It will provide a trace to the cause. Double click the first non-expandable line will take you to the line in the code where the failure happened.
Another helpful thing it does is provide a time for how long it waited before failing. This can be used to make sure you wait times are working as desired.

TestNG report:
This report has two main ways of being seen. There is the index.html file or the emailable-report.html file. These reports are nice to use for managers and those in the office who want to know the results and that you are actually doing something productive besides watching Doctor Who episodes all day. Which by the way the need to bring back David Tennant. He was the best. To view the reports, locate them in the project files using finder on a mac or file explorer on pc.
The index.html file. Allow the active-x to have permission and then you can click around and see the info that is collected.
The emailable-report.html file.

Reporter:
The final thing worth knowing about reports is that you can print outputs to the reports similar to the println code that is seen in the output window. To do this simply put in a line of code like this:

Reporter.log("Type a message here to show in the index or emailable report");

These messages are in the reporter output section of the report.


Basic Selenium Webdriver Test w/Maven & Java & TestNG


  1. Follow steps in the Getting started with a Selenium Maven project using Netbeans post. For this example you will need the testNG dependency.
  2. Expand "Test Packages" folder.
  3. Right click on the package. Expand "New". Select "Java Class"
  4. Create a Test case by writing a method using TestNG annotation.
  5. Write selenese code. This example is take from Official Selenium Site.
  6. Right click on java class containing test and click test file or use Ctrl + F6 if on the open file.
  7. The webdriver browser will open and run the test. See post on Analyze TestNG test results.

Thursday, August 15, 2013

Getting started with a Selenium Maven project using Netbeans


1. Click the "New project" icon or it is listed under File toolbox.


2. Select the Maven folder under categories and then select Java application.

3. Finish the setup by choosing the name and file location you want for the project.
4. Now that the project is created, open the pom file located in the Project Files folder of the project.

5. Add the selenium dependency. Check the selenium site for the most current version.

    <dependency>
        <groupId>org.seleniumhq.selenium</groupId>
        <artifactId>selenium-java</artifactId>
        <version>2.32.0</version>
    </dependency>

6. Clean and build the project. It will take a little longer because it will download the selenium tools to the project.